Visa Application Guide Series: How to Apply for US Tourist Visa (B-1/B-2)
Are you a Filipino planning to apply for a US tourist visa? Here are some things you need to know.
Having just recently applied for my US Tourist Visa (B-1/B-2) visa, I noted down the important timelines, documents and preparations that you (you, who are planning to apply for a US Tourist Visa) might want to know.
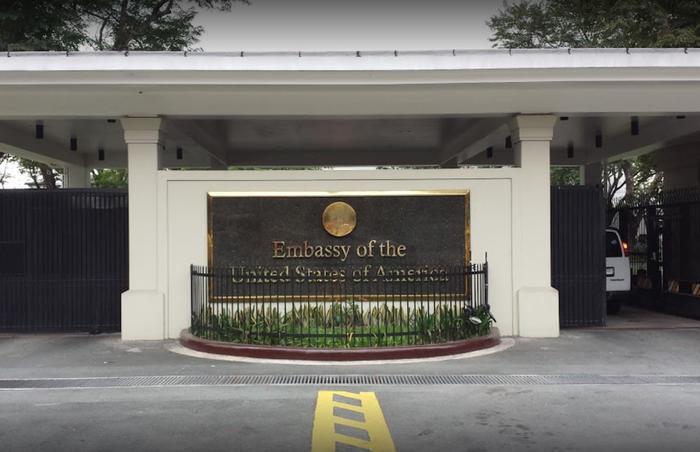
IMPORTANT NOTE #1: US B Visa interview appointments in the Philippines are only conducted at the Embassy of the United States, Manila, 1201 Roxas Blvd, Ermita, Manila, 1000 Metro Manila, Philippines. If you live in Cebu or in any of the other provinces, you will have to travel to Metro Manila for your appointment.
IMPORTANT NOTE #2: It is encouraged that you apply for your US Tourist Visa (B) at least 3 months from the date of your intended travel.
More of this series: Visa Application Guide
Show All- Visa Application Guide Series: How to Apply for US Tourist Visa (B-1/B-2)
- Visa Application Guide Series: How to Apply for Schengen Short-Term Tourist Visa
- Visa Application Guide Series: How to Apply for a UK Standard Visitor Visa
- Visa Application Guide Series: How to Apply for a New Zealand Visitor Visa
The Mandatory Documents
Prepare these at least 3-6 months ahead of your planned appointment date. 6 months so you have enough leeway to apply for a new passport, in case your passport will expire soon.
It is important that you prepare your mandatory and supporting documents before you apply. Some of these documents might take time to retrieve, so here's our recommended timeline for you to prepare your documents.
The mandatory documents are those that are REQUIRED and without these, you cannot proceed with your US Tourist Visa application.
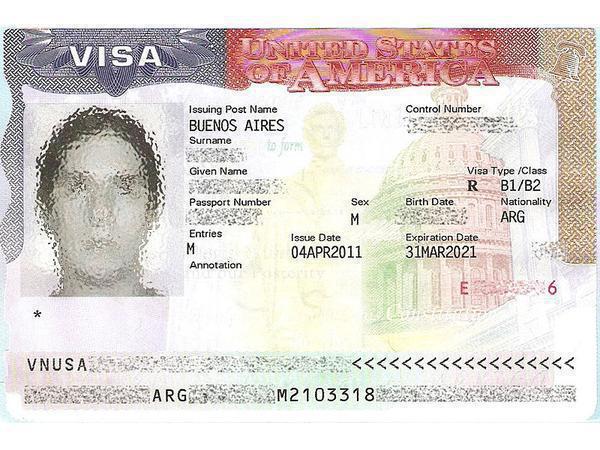
- Original passport. Your passport must have a six-month validity from your expected arrival date in the US. If not, you will need to renew your passport. To schedule for your passport renewal will take time, from 2-6 months, depending on which city/province you are applying in. To set an appointment, click here. Click this link to read more about renewing your Philippine Passport. To date, the earliest available slot in DFA Cebu is in October 2018.
- Old passports. Bring all your old (expired) passports. In my case, the officer went through the old passports to check out my travel history.
- A 2x2 colored photograph with white background. Prepare the hard copy, which will be submitted physically, and one soft copy, which will be uploaded on their website. It will only take 1 day to get your photo taken
- DS160 US Visa application confirmation page -- we will get back to this later. This will take an hour or less to complete.
- Your proof of payment of visa application fee. Payment can be made online or thru selected banks. This can be done in half a day.
- Printed copy of the US Interview appointment letter -- we will also get back to this later.
The Supporting Documents
Prepare these at least 1 month ahead of your planned appointment date. Some documents might take a long time to be delivered to your home.
The following supporting documents will be used to prove that you are financially capable of supporting yourself while in the US. Or, for the case of most Filipinos, that you will not work illegally or overstay in the US.
- Certificate of Employment / Business Registration Certificate / Enrollment Form. The certificate of employment should state your current position, date when you were hired, and current monthly salary. For students, the official enrollment form will suffice. For business owners, a DTI registration certificate will do. Obtaining a certificate of employment will depend on your company's policy. For some, it will only take less than 24 hours after your request for an employment certificate. For others, especially MNCs with centralized HR systems, it will take up to 1 week. Presumably, business owners, should already have the original registration certificate ready. Students should already have a copy of their enrollment forms on-hand too.
- Proof of Funds. You might be asked to produce your bank statements (last 3 months bank statement), bank certification (latest), copy of your passbook (last 3 months) and other proof of cash. For most banks, especially those who are "preferred" clients, requesting for a bank statement/certification is free, and will only take a few minutes to half a day. For other banks, the processing might take a bit longer -- 3 days at most.
- Tax Documents. Whether you are employed or self-employed, tax returns will come in handy. Since these are filed every year, you are expected to already have them.
- Travel Itinerary. Prepare a brief itinerary of your stay in the US. Where you will stay, how long you will stay. The states, the attractions, estimated cost and etc. In my case, it took me a month to prepare the itinerary.
- If someone is sponsoring your visit, you need a letter of invitation or a proof of the event. The invitation should state who will sponsor your stay, their source of income (employed or self-employed) and etc. Request from your sponsor and allocate 1 month for the receipt of this letter/document especially if they will be sending it over by mail.
- For government employees, you should produce the necessary clearance or permission to travelon the said dates. Processing this will take about 1 week at most.
The DS-160

Completing the application will take less than an hour.
Now that you have your documents ready, let's proceed with the application. Application is now online. Apply via https://ceac.state.gov/genniv/
What is the DS-160? It is an online application form that is submitted electronically. For this, you will need to prepare the digital copy of your photograph (with white background) and fill up the information concerning you and your background. Make sure you check and recheck all the details -- especially your personal and employment details.
After checking and making sure that all the information is accurate, submit the electronic DS-160 form.
You will then see a confirmation page with a barcode on it. Print this out. This is your DS160 US Visa application confirmation page (mandatoryrequirement #4 as stated above).
Here's a guide on how to complete your DS-160 application: http://ustraveldocs.com/ph/ph-niv-ds160info.asp. Any inquiries about the DS-160 application form will be addressed here.
Payment for Visa Type B (Tourists)
Note (will be updated from time to time): US Visa Application fee for Tourists (Visa Type B) as of July 2018 is US$160
You have a few options to pay for your US Visa Application Fee.
Online Payment
Click the respective links for detailed instructions, if you prefer to pay online:
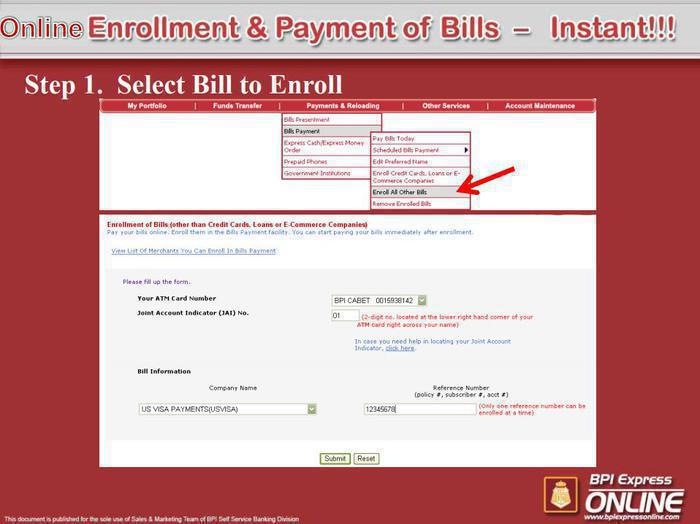
- BPI. For step by step instructions from BPI, view this comprehensive presentation.
- Bancnet. For step by step instructions from Bancnet, view this document.
Save and print the generated receipt as this will be needed for your appointment scheduling.
Cash: BPI
Print your respective US Visa Application deposit slip: Deposit Slip - $160 MRV Fee
Then, go to any BPI branch. Take the printed deposit slip with you and pay the necessary amount. You can pay in US Dollars ($160) or in Philippine Peso (P8,800).
You must not print multiple copies of the same deposit slip. Also, note that each deposit slip has an "expiration date". Pay your fees using that particular deposit slip before the expiration date. If you are unable to do so, go back to this page to print another deposit slip with another reference number.
After paying KEEP THE BANK RECEIPT. Make several copies as it cannot be replaced if lost. Also, you need the receipt (reference number) in order to schedule your appointment.
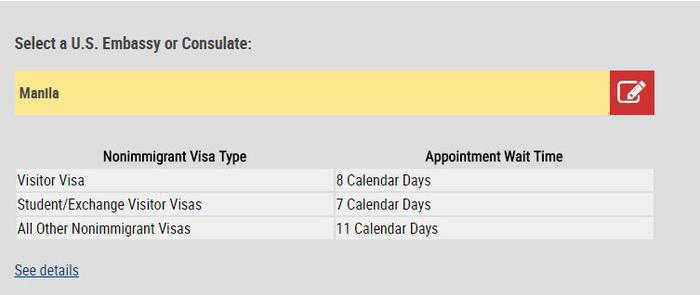
Set Your Appointment Online
Setting your appointment and creating your profile will take less than an hour.
Before proceeding with this step, prepare:
- a strong password
- your passport number
- your receipt number from your BPI or BancNet receipt
- the 10 digit barcode number from your DS-160 confirmation page
First, create your profile at https://cgifederal.secure.force.com/?language=English&country=Philippines
Fill up all the fields and create a strong password. Upon logging in, check on the left-hand side menu and click on Schedule Appointment.
Select how and where you wish to receive your passort should it be approved. Then, confirm the visa payment and schedule your appointment.
Select your preferred appointment date and time. After confirming your preferred appointment date and time, print out the US Interview appointment letter (mandatory requirement #6 above).
Visa Processing Time
Visa processing will normally take 3 working days. However, in some cases, the processing time may take longer -- some up to 2 weeks.
Other Preparations: Air Fare + Hotel in Manila

You might need a couple of days to find the best air fare deal or the most suitable place to stay in.
Air Fare
After scheduling your appointment date and time, it is now time to book your plane tickets for Metro Manila (if you live outside the capital). As suggested, schedule your appointment at least 3 months early so you still have time to purchase plane tickets at lower costs. You will need to prepare P3,000 (if you're lucky) to P10,000 for plane fare.
Accommodations
If you have friends or relatives in Metro Manila, arrange to stay with them for a couple of days for your US Tourist Visa interview. If you don't know anyone, or prefer not to bother anyone, book a hotel or go to Airbnb and find affordable rooms to rent for a couple of days.
Tips: On the Day of Your Appointment
The interview will most likely take half a day. Don't make any other plans for the rest of the day, just to be sure.
On the day of your appointment, remember to bring:
- ALL the mandatory documents stated above: which include a printed copy of your appointment letter, your DS-160 confirmation page, 2x2 photograph taken within the last six months, your latest valid and all old/expired passports. If you don't have any of these, you will be unable to proceed with your application/interview.
- The supporting documents which apply to you.
You are not allowed to bring large electronic gadgets such as phablets, laptops or tablets. Thus, it would be better if you leave these (even your cellphone) inside a safe in your hotel. Else, you cannot go inside the embassy.
Dress properly for the interview. Do not wear slippers, shorts, or revealing clothing. Dress to be respected.
Arrive at least 15 minutes ahead of your appointment time.
Have breakfast and be mentally alert. Listen to the interviewer's questions.
On the day of your appointment, you will be ushered into a room where you will go through the following (in a specific order):
- Checking of your passport and appointment confirmation printout.
- Fingerprinting. All 10 fingerprints will be scanned.
- The interview proper. Minors (under 18 years of age) need to be accompanied by their parents.
Approval/Disapproval
If denied, your passport will be immediately returnd to you after your interview. Some officers are kind enough to give you the reason why they are denying your US Tourist Visa Application.
If approved, the interviewer will keep your passport and it will be delivered to the location where you want to receive it. You will be asked to pay the courier fee too. Remember to make sure you are in the house/preferred location to receive and sign for your passport.
Unfortunately, you will not know if you've been given 1, 5 or 10 years single or multiple entry visa immediately after the interview. You will have to wait until you receive your passport.
Good luck!
More of this series: Visa Application Guide
Show All- Visa Application Guide Series: How to Apply for US Tourist Visa (B-1/B-2)
- Visa Application Guide Series: How to Apply for Schengen Short-Term Tourist Visa
- Visa Application Guide Series: How to Apply for a UK Standard Visitor Visa
- Visa Application Guide Series: How to Apply for a New Zealand Visitor Visa